
Picking the perfect brake pads for your ride has an influence on how safe you are, how well your whip handles, and what you’ll shell out over time. You’ve got a whole menu, from wallet-easy organic pads to fancy ceramic or semi-metallic types. To get why budget brake pads ain't the same as the pricier […]

How to Change Motorcycle Coolant: A Simple DIY Guide (Save $100+)
If you're into motorcycles, you know that regular maintenance has an impact on your motorcycle's performance. Most riders remember to change the oil and check tire pressure, but one thing often gets overlooked: the coolant. You might ask, "Hold on, my motorcycle has coolant?" Unless you ride a specific old model, it does. Since coolant is essential to control the motorcycle engine temperature, you need to change motorcycle coolant regularly.
In this guide, I'll walk you through changing your motorcycle coolant. Relax, it's more fun to work on your motorcycle when you're not stressed about it. Ready to get started? Let's dive in!
Table of Contents
Why You Should Change Your Motorcycle Coolant
Let's talk about why this matters before we get our hands dirty. Your motorcycle coolant stops the engine from overheating. It also prevents rust from forming in your cooling system and helps everything run. As time passes, coolant can break down losing its ability to do these essential jobs.

Replacing the Coolant on a Motorcycle
Here's how bad coolant can harm your motorcycle:
- Engine overheating: Old coolant may lose its ability to transfer heat, which can cause your engine to overheat.
- Corrosion: Degraded coolant triggers rust in your engine parts, radiator, and hoses.
- Clogged cooling system: Over time, coolant gets dirty creating buildup that blocks your cooling system.
Changing the coolant isn't rocket science. It's pretty simple. But here's the thing: you need to do it right. So, get your tools ready, and let's begin.
Tools & Materials You'll Need
- New Motorcycle Coolant: You'll find many types so check your motorcycle manual to get the right one. Most of the time, you should pick a coolant made for motorcycles, which doesn't have silicates. Many riders use a mix of distilled water and antifreeze (often a 50/50 ratio).
- Funnel: This helps you avoid spills when you're filling up.
- Drain Pan: This catches the old coolant. Believe me, you don't want that stuff to spill. It's not just toxic, but it'll ruin your driveway too.
- Basic Hand Tools: You'll need a wrench set or screwdriver to take off panels or bolts.
- Rubber Gloves: You don't want coolant on your skin. It can irritate and harm you if you touch it.
- Rags: To clean up.
- Optional: A Coolant Tester: This helps you check how good your current coolant is before you decide to change it.
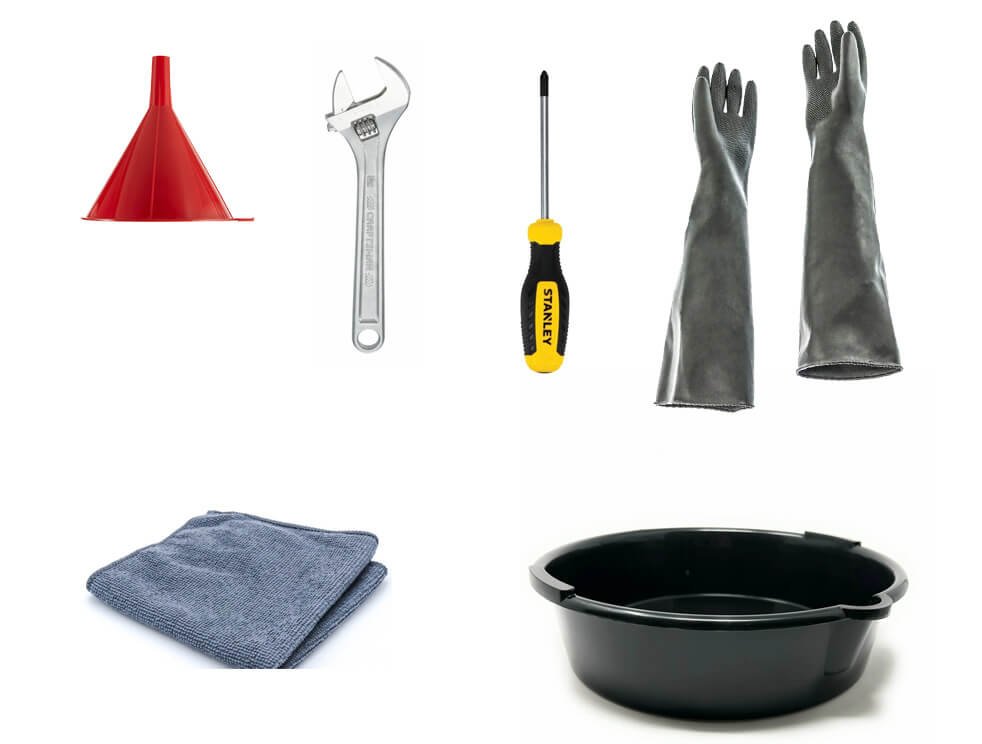
Tools needed to change the coolant on a motorcycle
Remember: Don't use car coolant! It often has stuff in it that can harm your motorcycle's aluminum engine parts.
Step-by-Step Guide to Change Motorcycle Coolant
Step 1: Get Your Motorcycle Ready
First, put your motorcycle on a stable surface on a lift or center stand so it stays upright while you work. You don't want your motorcycle to tip over and turn into a costly, engine-scraping mess.
Then, let your motorcycle engine cool down if you have recently ridden it. If you want to avoid burns from hot engine parts or pipes so take your time here.
Step 2: Find the Coolant Drain Bolt
Most new motorcycles have a coolant drain bolt on the engine block or at the radiator's bottom. You might need to take off some panels or plastic covers so grab your tools to loosen bolts or screws.
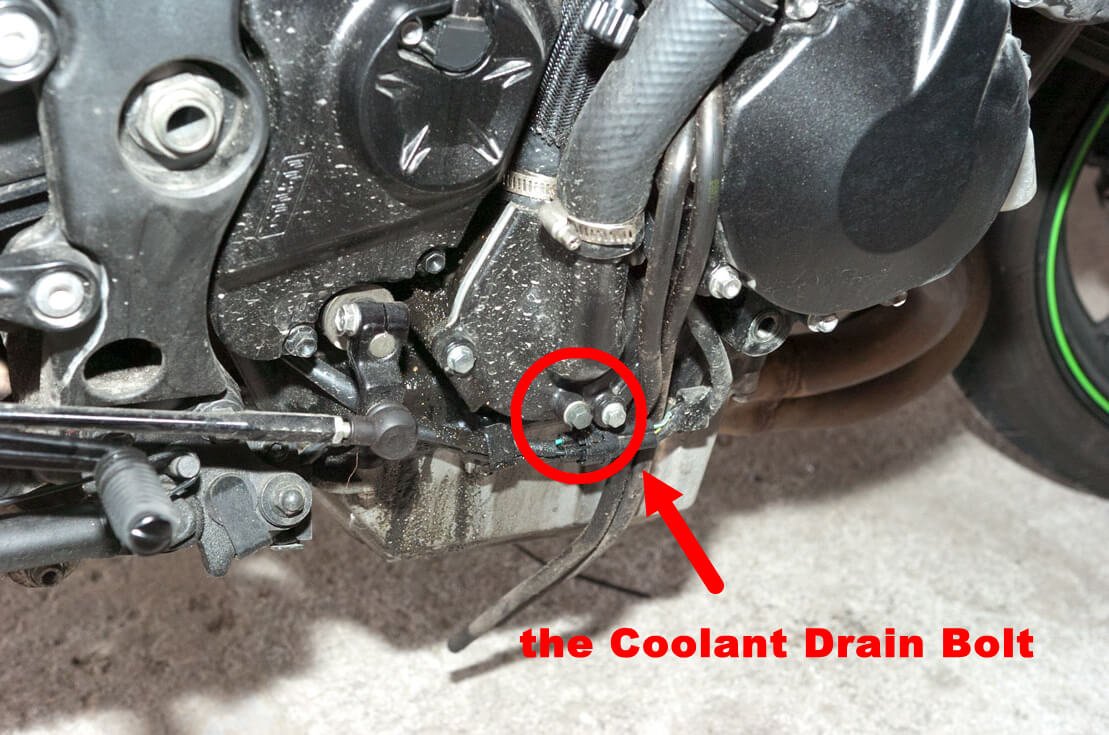
the location of the coolant drain bolt
Tip: Can't spot the drain bolt? Check your owner's manual or search online for your motorcycle's model. It’s worth the extra 10 minutes to avoid unnecessary confusion.
Step 3: Drain the Old Coolant
Put your drain pan under the engine (or wherever you find the coolant drain bolt). Now, grab the right wrench loosen, and take out the drain bolt. Let all the old coolant run into the pan. Take your time with this! You need to empty the system as much as you can.
Quick Tip: Check the coolant. If it looks rusty cloudy, or smells weird, it's time to change it. If it seems fine, your motorcycle might be okay for a while longer.
Step 4: Flush the Cooling System (If You Want)
You don't have to do this every time, but if you want to be extra thorough, you can clean the system with distilled water to get rid of any lingering dirt, debris, or old coolant.
Here's how you can do it:
- Put the drain bolt back on.
- Fill the system with distilled water.
- Start the engine for a short time to move the water around (remember to keep the radiator cap off and put the motorcycle on its center stand to avoid spills).
- Drain the water again and do it one more time if needed.
Step 5: Add New Coolant
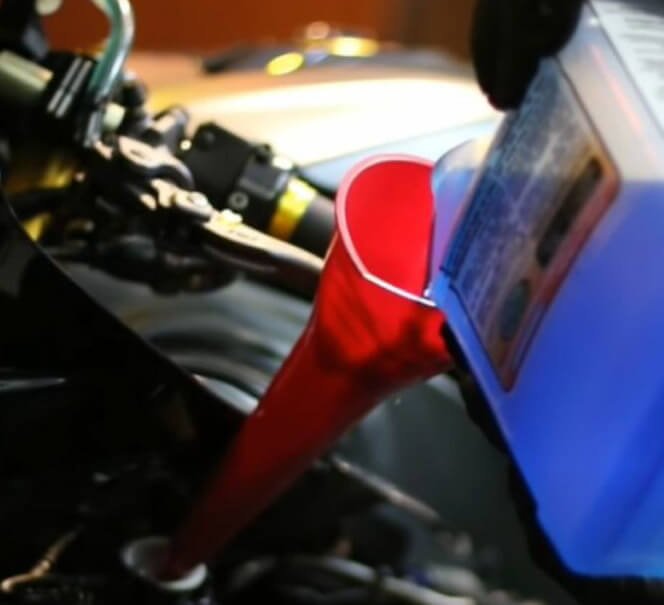
add new coolant for motorcycle
After you drain (or flush) your cooling system, you need to fill it up with fresh coolant. Use a funnel to pour the new coolant into the radiator or coolant reservoir.
Tip: Take it slow and pay attention to the level. Don't put too much in the system—if you do, you'll create a mess when you start the engine. Always check your owner's manual to see how much coolant your motorcycle needs.
Step 6: Bleed the Cooling System
Bubbles in your cooling system can make cooling less effective so we need to get them out. To do this, you run the motorcycle for a few minutes and let it warm up while watching the coolant level.
Some motorcycles have a bleeder screw near the thermostat housing or at the top of the radiator. Loosen this screw a bit while the engine runs, to let any trapped air escape.
After you've removed the air, tighten the screw again and check the coolant level one more time. Top it off if necessary.
Step 7: Check for Leaks
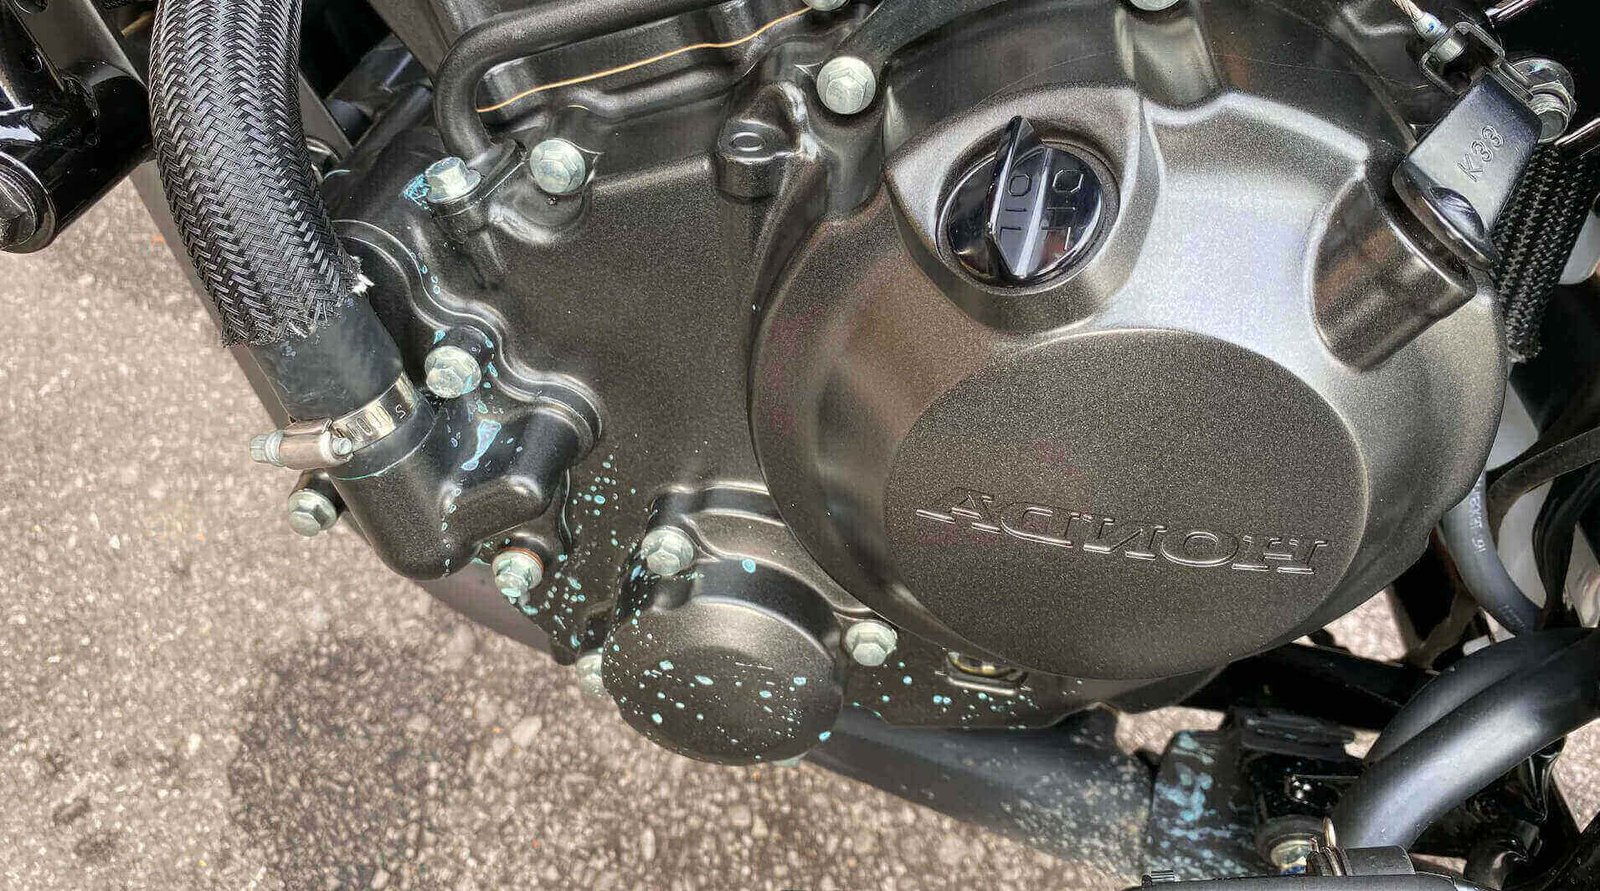
check carefully to avoid motorcycle coolant leaks
After you finish refilling and bleeding, inspect the coolant reservoir, radiator, and drain bolts thoroughly to spot any leaks. A slow leak might not be noticeable at first but could cause big issues down the road.
Step 8: Dispose of the Old Coolant
Now that you've completed the task, avoid pouring the old coolant down the drain or dumping it on the ground. This harms the environment and breaks the law in certain areas. Most auto parts stores will accept it for recycling. Look into local disposal guidelines.
Conclusion
Changing your motorcycle coolant might look tough at first, but it's easy once you learn how. If you follow the steps, your bike will run cooler and better soon.
Remember, your motorcycle needs regular care, and this job could save you cash in the future by preventing overheating or engine issues. Plus, you'll feel proud doing it yourself. So get ready grab your coolant, and dive in—you can handle this!
You may also interested in

Motorcycle mechanic, writer. Interested in motorcycle gear for years. Like to stay up to date with the newest products and techniques of the motorcycle.
Subscribe
Login
0 Comments
You maybe like to read:
E-bikes have transformed into more than just gadgets to help you get around. Now, they're speed demons that can go toe-to-toe with motorbikes. It’s 2025, and these speedy machines have gotten a huge boost from better motors, more powerful batteries, and sleek designs that cut through the air like a knife. Let’s dive into the […]
Many riders who aren't so tall or ladies just starting to ride bikes need to pick out the best Motorcycles for Short Riders and Women. They gotta look for three key things: a seat that's not too high up, a bike that's not too heavy, and something that looks good enough to give them confidence. […]
As we accelerate into 2025, motorbikes are getting a serious tech upgrade. They’re all about safer rides and more fun on the road. Even if you’re a pro or just starting, kitting out your two-wheeler with cool tech stuff is a game-changer. Check out these ten top motorcycle gadgets each motorcyclist will want in 2025. […]
Getting around the city every day can be super annoying. You've got traffic like molasses nowhere to park, fuel prices through the roof, and buses stuffed like sardine cans make heading to the office a real pain. For loads of folks, getting a motorcycle is a pretty slick move—they’re nimble, cost-effective, and perfect for squeezing […]
Rider safety demands motorcycle helmets. Yet, riders still clash over picking full-face vs open-face helmets. Full-face ones take the win for protecting in crashes, but open-face models charm folks who want cool looks better air, and that old-school vibe. This guide dives into the latest research, technological advancements, and real-world insights to help you decide […]